Recycled Planter
There is no such thing as away,when we throw anything away it must go somewhere.
So Reduce ,Recycle & Reuse.
Why throw old and waste boxes out of the house ,when you can make something marvellous out of those boxes.
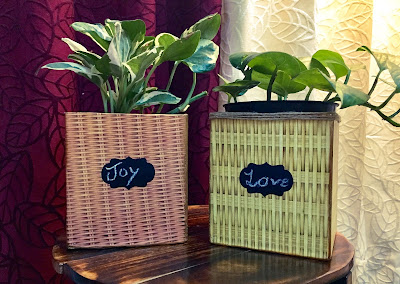
Here I am presenting Recycled Planter made of with old carton box. You can also make this Planter
/ organizer by following these simple step
 |
| Recycled Planter |
What you need?
- Base (here i am using waste carton box)
- Bamboo Textures paper from Nakshathra Design
- Acrylic colors
- Gesso
- Decoupage glue and varnish
- Flat brush
- Sponge
- Sand paper
- Twine / Rope ( optional)
What you need?
 |
| Before |
 |
| After |
Procedure
1. Base coat the
box with white gesso. Base coat ensures that the colors of your paper
remain
bright
2. Choose a paper
of your choice. Cut out the part you would like to use. I chose Mosaic love
pattern paper from Nakshathra Designz. Now hold the paper very carefully
and start applying
glue in one direction. Go easy on glue. You can use
your fingers to remove wrinkles & bubbles
from your paper. Just press
down the paper very carefully
3. Once all your
paper & base glued down, keep it aside to dry. Once it gets dried,
use a sand
paper to remove extra paper hanging off the surface
4. After that give
1-2 coats of decoupage glue on your box. 2 coats of decoupage glue is enough
to seal your project. You can also use varnish to make your box more
secure and waterproof
5. At the end
decorate your box with twine, strings etc. This step is totally optional. Here
I am
using twine and little rewritable stickers on the planters
6. With these
simple steps you can also make your Recycled Planter or organizer. All
materials
are easily available in local market.
If you liked the
project please do comment in the comment section below.
Happy Crafting


Comments
Post a Comment